Monday, 10 November 2014

Photoshop Adjustments : Levels


Photoshop Adjustments : Levels


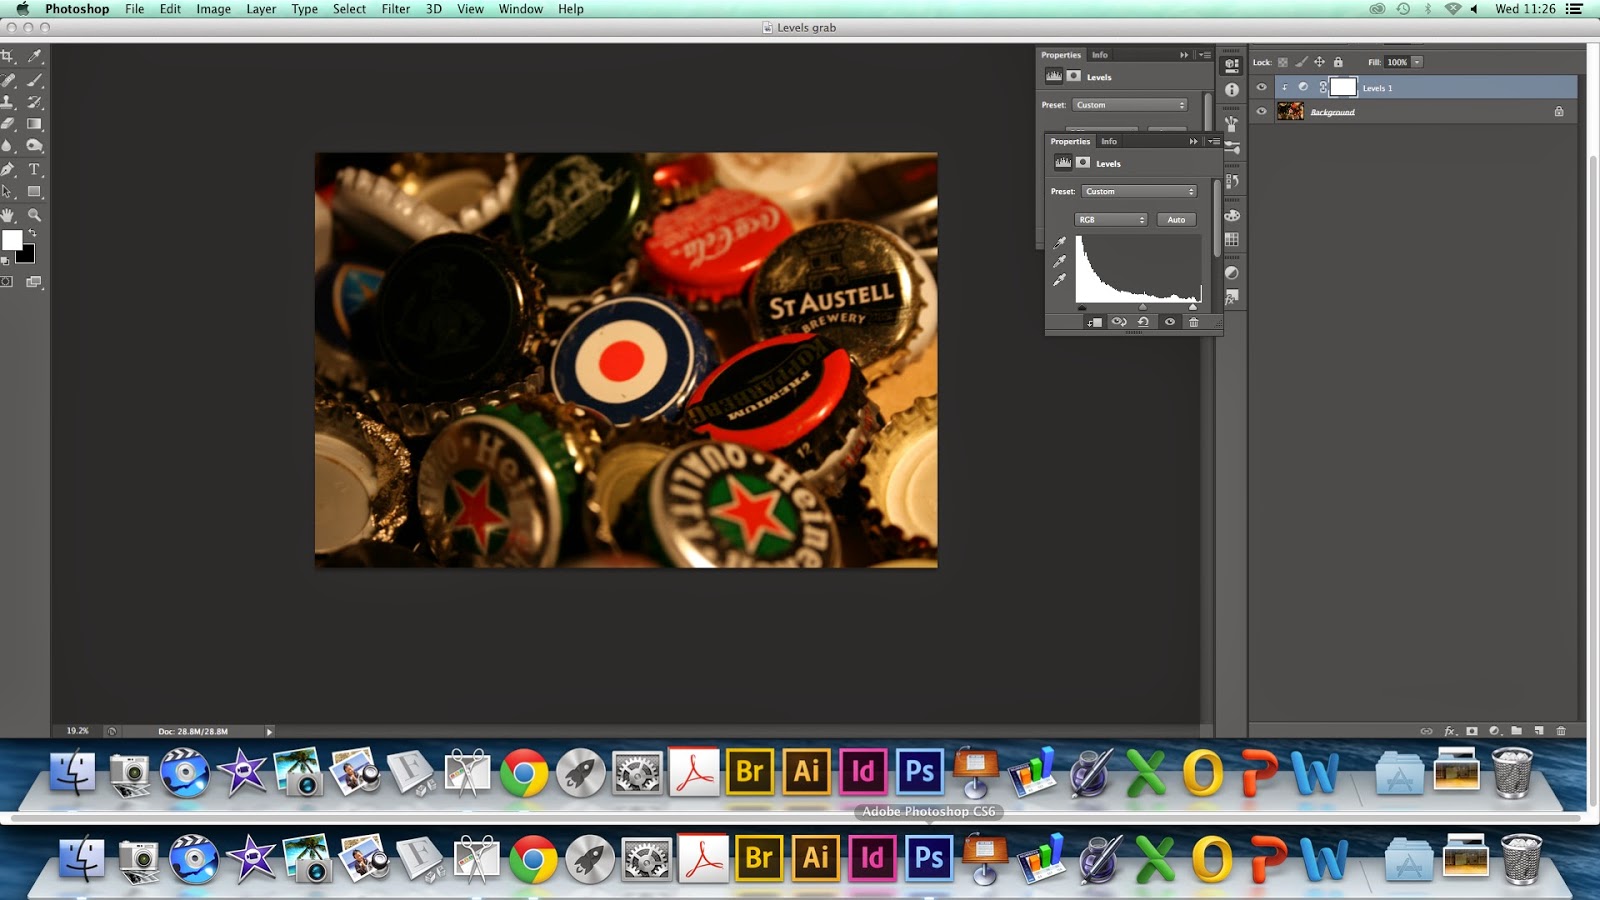
This is the image I chose to start with, an assortment of bottle caps. 


At the bar on the top go to layers then adjustment layers and a tab will appear on the tool bar on the right hand side.


Then  moved the sliders in a little to make the colour more saturated in the image.


This is the final outcome of the image.

Monday, 3 November 2014

Studio Lighting + health and safety


Depending on what effect you want in your photograph there are different lighting setups that you can use the main two are high profile lighting and low profile lighting ill explain the criteria for both for high profile you will need 

x2 lighting stands
x2 power leads
x2 flash heads
x2 sync lead or Trigger & Receiver
x2 soft box
x2 protective plastic caps

In a setup similar to this one


and for low key you will need 
x1 lighting stands
x1 power leads
x1 flash heads
x1 sync lead or Trigger & Receiver
x1 snoot
x1 protective plastic caps

and a Low Key setup looks like this 


Health and Safety
The ring flash shown here and the modelling lamp is made of very 
fine glass that can cause painful glass splinters if broken. 
• Do not touch the bulbs especially after use, as they get 
very hot.
• Do not knock the bulbs when fixing light accessories to the unit, as 
this will make them fragile.
• Do not put the protective plastic cap over the bulbs until they have 
cooled. Leave the light accessory in place until ready.
• Do not leave lights on when not in use
While working in the studio you must keep the environment safe:
• Leads should be kept tidy and either taped to the floor or covered 
with rubber mats
• Do not leave coats and bags on the floor
• Do not set your equipment up by a door way or in front of a fire exit
• Act professionally when working with expensive studio equipment

Monday, 29 September 2014

Photograms


Photograms Introduction


Photograms are a different way of using photographic paper, a way of creating white silhouettes on a black background you can have coloured photographic paper but in this introduction its about negative paper.

Equipment
-You will need access to a functioning darkroom
- You will need photographic paper
- You will need developer, stop bath and fix chemicals
- You will need a photographic enlarger
- An assortment of items to place on your paper


Test Strip
Before taking your photogram you need to test the exposure of your paper you need to take a strip of the photographic paper and place it under your enlarger and place items on it covering its length but not all of the paper like a pencil from one end to the other.

Then get a piece of card and set the enlarger light timer to 3 seconds, then set of the timer and wait until it turns off


Then find the first part of the test strip that has pure black and that should be the correct exposure time and set your light timer accordingly.

Photogram
After you have set your exposure time place your items on your photographic paper, the paper must be shiny side up with the objects composed in your way and then put it underneath the enlarger with the light off! Then set of the timer covering the paper and objects in light for the correct amount of time and wait for the light to go out.

Developing
Take the paper off of the enlarger and put it in the developer for  minuets agitating the tray the whole time its in there (moving the tray) then put it in the stop bath for 30 seconds then move it on to the fix for a further 5 minuets and then into the wash for about 10 minuets and after that into a dryer.

Health and Safety
To stay safe in the dark room don’t run around for obvious reasons (its dark) and do not consume the chemicals because that will cause serious illness if ingested so wash your hands after using the chemicals also avoid splashing the chemicals out of there trays. Don’t look directly at the light in the enlarger because it will damage your eyes.